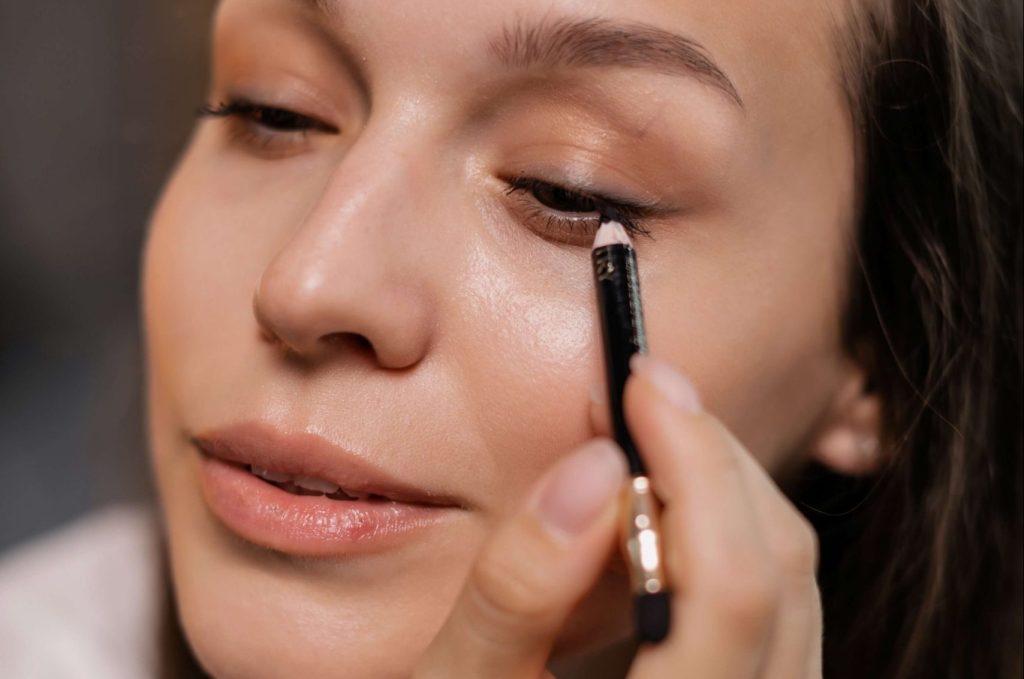
How to apply eyeliner
- Eyeliner isn’t an essential for the everyday makeup wearer or beginner. But it does help to accentuate eyes.
- It’s important to know how to apply eyeliner because this will allow you create the right wing/ flick or line that’s going to suit you.
- This is a step by step guide to applying eyeliner for the beginner.
Types of Eyeliners
- There are different types of eyeliners, pencil, liquid and gel.
- Pencil is usually the easiest to apply but provides a less obvious effect. Gel (dependant on the product) can be more intense but trickier than pencil and liquid eyeliner is usually the most difficult to apply.
- A pencil is always best for a softer look or everyday look and gel or liquid for more defined look.
Choosing the Right Eyeliner
- When choosing eyeliner always look at your eyes. Do you have plenty of space in the eye area as then you will have more choice and won’t find that liquid liner will transfer. If you are someone who has less space or creapier lids then pencil is a great because it’s usually more blendable.
- As a beginner try to stick to a dark colour, black of brown as this will tie in your pupils and the dark shade around your iris.
Preparing the Eyes For Eyeliner
- Its always important to prepare the eyes first. Remove all the oils or dirt with a liquid cleanser and then prime the eyelid with concealer as this will even eyelid colour and allow eyeliner to show up.
- Always apply eyeliner before mascara to prevent lashes from stiffening and if you are doing an eye look after eyeshadow.
Applying Eyeliner
- Applying pencil eyeliner – Take your eyeliner and if it isn’t mechanical sharpen it. Draw on the back of your hand to blunt the pencil slightly. You want it to be sharp with a soft tip. For any eyeliner application you will need to learn the perfect position to apply. This is keeping your mirror infront of you. Lifting your chin up and looking down to your mirror (this will allow your eyelids to be stretched and therefore will make application easier. Take the tip of your liner and start rubbing in short dashed three quarters of the way across your lash line towards the corner (stay 2mm away from the corner of the eyeline). Remember the dashes you create nearer your inner corner need to be narrower and then they can get slightly thicker towards the corner. Use the side of the pencil to do this. Go over the line again but this time placing the dashes in between the ones you’ve already created. Do this until you’ve created a line. In between these dashes keep checking your line by moving your head to the normal position. Now that you have created a small line, stretch your eyelid again and extend the line out by a 5mm at a 45 degree angle from the horizontal position that extends from the corner of your eye.
- Applying liquid eyeliner – You need to take even more time with this method because the ink from a liner will make a very obvious mark and again will be more difficult to hide if you make a mistake. The best thing to do is to take the pen and start to stamp or slide it gently over the back of the hand so that you can see how softly you need to press to get a thin line. Once you have tried this, start at the outer corner of the eye and slant the tip of the liner on its side (not pointed on the tip) and stamp it on the lash line as close to the lashes as possible. At this point there is no dragging movement, just almost stamping the edge of the liner. Repeat this more inwards (with gaps between the dashes) and make sure the side of the liner is pushed more into the lashes the closer you go to the inner corner. This is so that you can make the dashes narrower at the inner corner and thicker at the outer. Once you have a line of dashes then you can start to sweep the flat of the liner to join them or just stamp in between the dashes. When you get 2 mms from the outer corner, turn your tip at a 45 degree angle so that you can create a wing or flick and sweep the liner upwards slowly. Repeat on the other side.
- Applying gel eyeliner – with gel eyeliner the trick is to make your brush as flat as possible. Once you dip the tip of the brush in the product make sure you wipe each side of the brush on a tissue or back of your hand, this will press fibres together and narrow the tip and also take off any excess product. Use your brush tip and press it gently along the lash line. Continue to do this one dash next to the other out towards the outer corner of the eye. The gel product should be moveable so with transfers to the skin and smudge along the line. When it comes to the outer corner tilt your brush at a45 degree angle and stamp but drag outwards to create a wing.
- Applying powder eyeliner – This can be tricky because the product is dry so ensure you prime your eyelid before you begin. Wipe the tip of the brush in your powder (a damp brush can help to attach the powder to the brush if it is a synthetic brush. Take the brush as close as you can to the lash line at the inner corner and stipple the brush to transfer the powder. Repeat this next to each dash of powder. Each dash can be placed next to the last. Start narrower at the inner corner and go a touch wider on the outer corner. Take the tip of the brush at a 45 degree angle for the wing and stipple again. Go over the entire line with powder to ensure a more intense liner look.
- Should you make any mistakes one of the best things to have to hand is a dry cotton bud and some cleansing water to erase mistakes. Usually you can remove anything you don’t want with a dry bud by making contact with the area and then twisting and lifting the bud away. But for more intense liner like the liquid the bud may need to be wet with cleansing water.
Eyeliner Styles
- There are different eyeliner styles. Cat-eye is where it may appear as a feline flick and usually more elongated and a gradual thinner to thicker effect. Whereas a winged liner would be more chunkier at the flick and a little less elongated. Other types of effects can also be used, for example Kohl liner, where you would use Kohl pencil for darkening the water line. Or a smudge liner where you would use a kohl or gel liner pencil to mark along the lash line and smudge outwards with a brush.
- The key to achieving a cat eye is to start very narrow and then take the line slightly thicker and when extending the line at the outer corner take it up to a 30 degree angle and extend. The key to a winged liner is a higher angle more like 45 degrees and a thicker line.
- I would say to begin with start with a gel pencil and smudge for ease and so you don’t have to create the perfect line each time, there is room for error as you can smudge the line. When starting with liquid liner I would say to follow the above advice using the ‘dashes’ method.
Maintenance and Removal
- A good eyeliner will generally stay in place and not smudge. To assist it staying in place be sure to prime your eyelid thoroughly.
- The best way to remove eyeliner is with an oil based or water/ oil mixed liquid cleanser. If you have sensitive eyes pick a cleanser specifically designed for eyes but for most of us a regular liquid cleanser will suffice. Soak your cotton pads and press lightly over the eyelids after a few seconds, wipe pads outwards and repeat. Rub if needed but only very gently.
Apply Your Eyeliner With Confidence
- These tips will give you the methodology for eyeliner application and keep it as simple as possible. Trying different types of eyeliner will allow you to see which you feel more comfortable applying. Don’t forget eyeliner isn’t the easiest thing to apply but practice is the thing that will have you perfecting it quicker!
- If you feel unsure on what style of liner to go for or unsure of which style would suit you or work with your eye shape, then please feel free to get in touch and I can see if I can help you through a 1:1 or virtual session.

